General manuals for all semi trailers. Click each image for the PDF.
General Tips, Tricks, & Maintenance
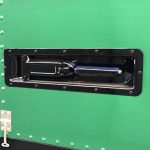
Side Door Latches
Rear Door Latches
Electrical System
Solar Panels
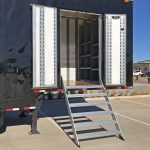
Stair Operating Manuals
Side Stair: Sprung (coming soon)
Side Stair: Manual (coming soon)
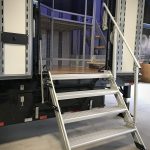
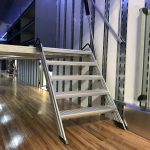
Side Stair: Electric
Rear Stair: Electric
Rear Stair: Manual
Ramp Operating Manuals
Hydraulic Ramp (coming soon)
Electric Ramp – Push Button Panel (coming soon)
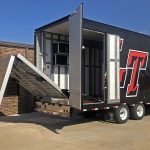
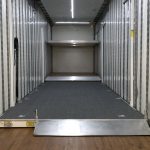
Electric Ramp- Switch Panel
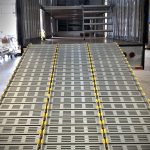
Roll-A-Ramp
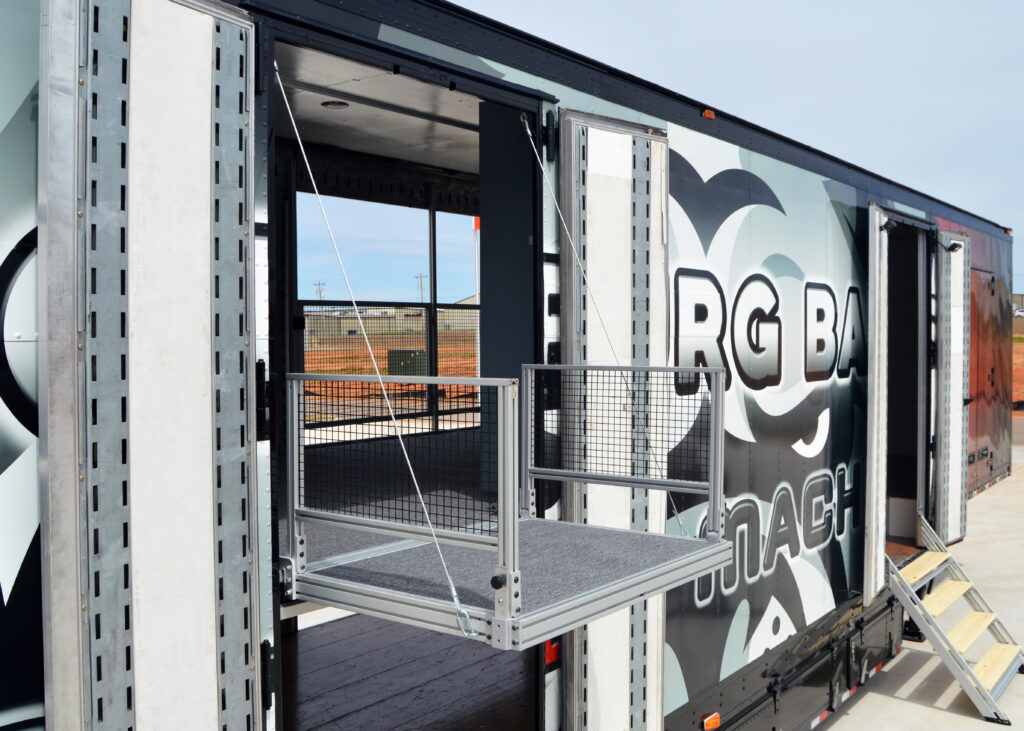
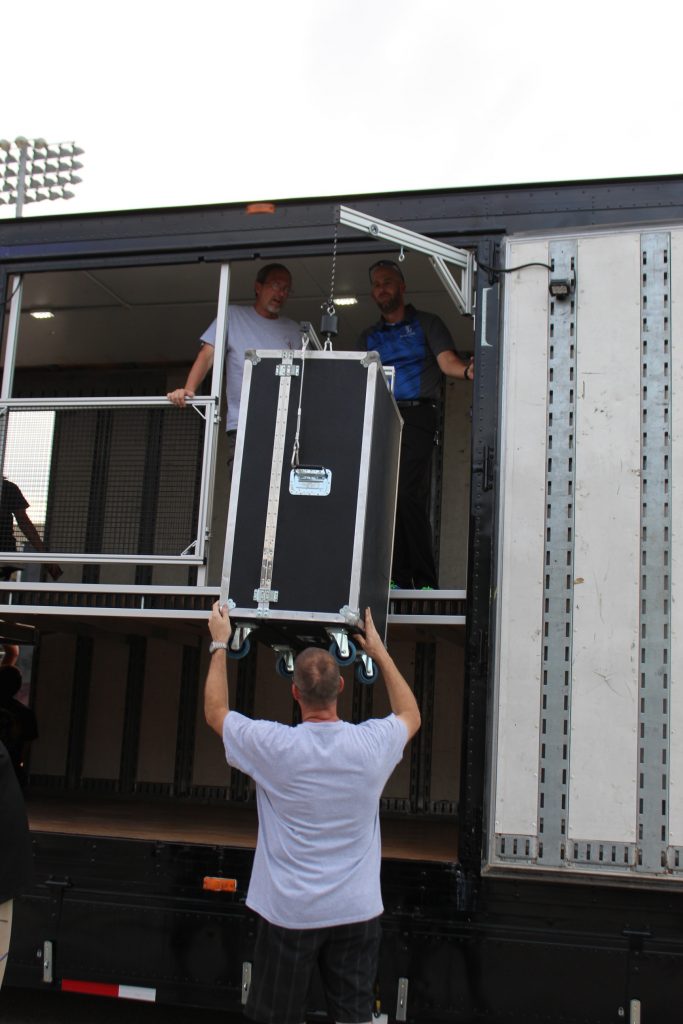
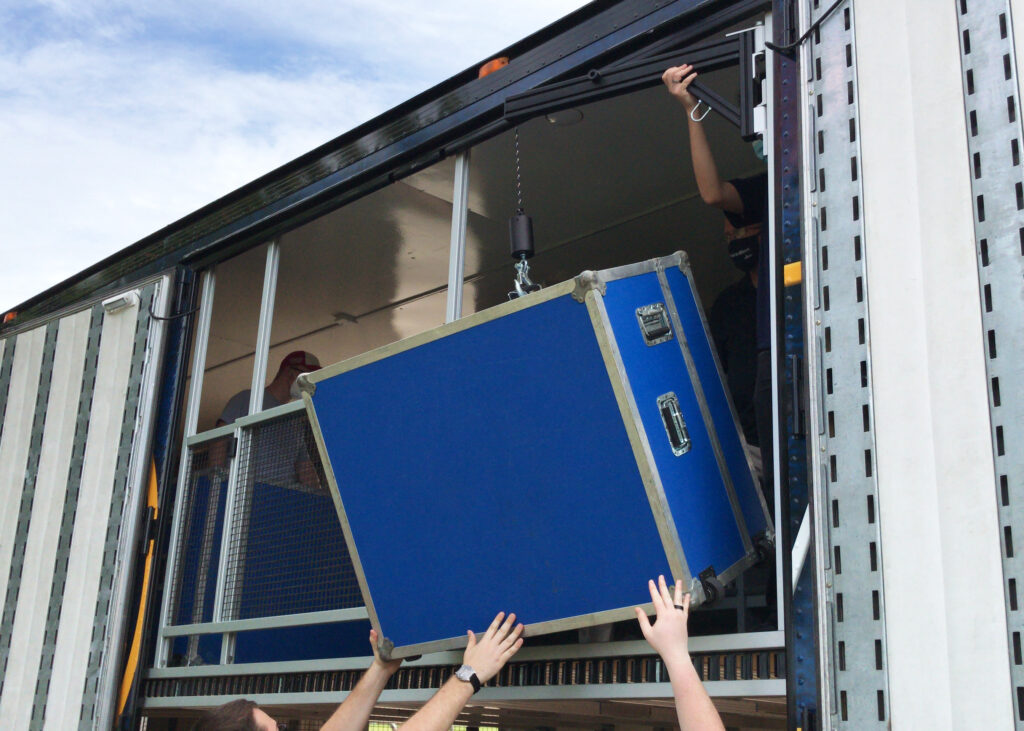
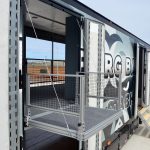
Flying Carpet
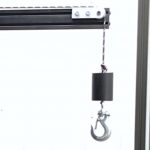
Pendant Deployment System
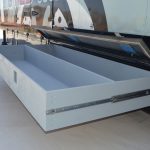
Belly Box Storage
Belly Boxes
Guard Drawers
Bells and Whistles
Shelving and Drum Wall
Director’s Perch
Hydraulic Tubavator (coming soon)
Electric Tubavator
Electrical Controls
Push Button Control Panel (coming soon)
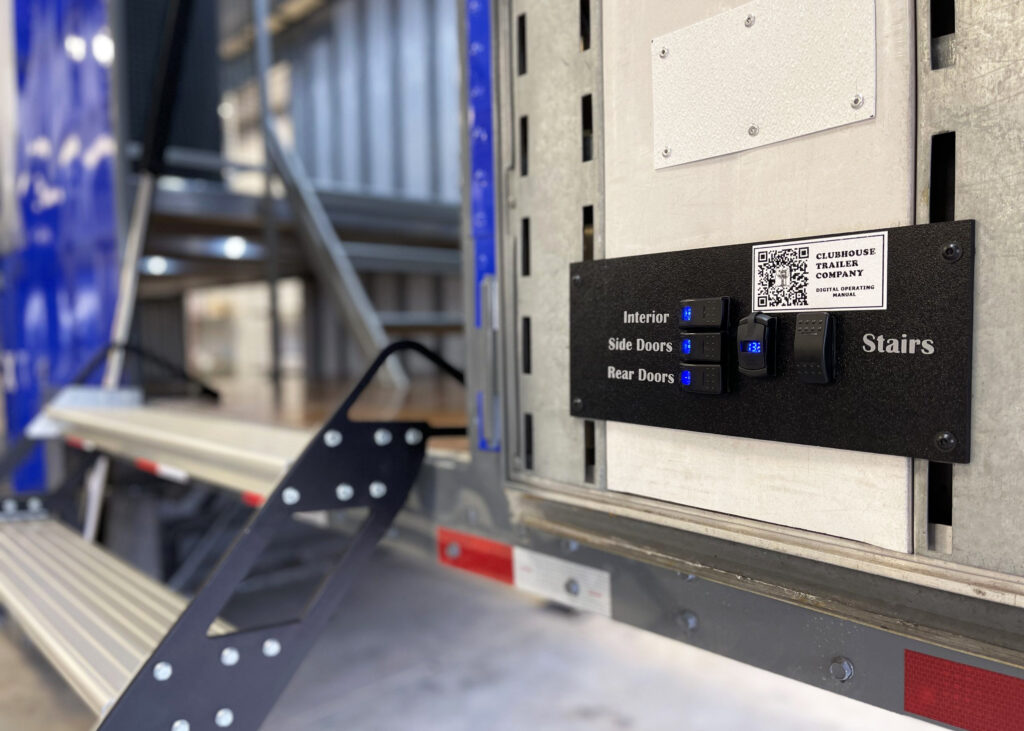
Switch Control Panel
General Operating Manuals - Small Trailers
Manuals for all small trailers. Click each image for the PDF.
General Tips, Tricks, & Maintenance
Latches
Drum & Instrument Shelving
Electrical System
Solar Panels
Self-Guided Troubleshooting Tool
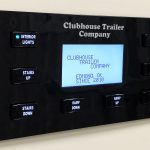
🚚 Clubhouse Trailers — Band Trailer Troubleshooting Guide
Let's get your trailer back on the road
What type of issue are you experiencing?
What electrical issue are you having?
Is the red LED on the front of the power cabinet on?
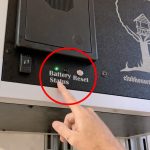
The red light indicates the Low Voltage Disconnect (LVD) has been triggered. This occurs when battery voltage drops below 11.8 volts. The LVD limits power draw and provides temporary reserve power to stow the ramp and stairs. It can be temporarily disabled by pressing and holding the silver reset switch on the front of the power cabinet. Your control panel (if equipped) may show "Low Voltage Disconnect."
Solution: Low Voltage Disconnect Triggered
Push and hold the silver reset switch on the power cabinet until the green light turns on.
Note the battery voltage on the volt meter.
If battery voltage is below 11.0v, the batteries may be past their usable life — check battery age.
If batteries are relatively new, check the solar charging circuit.
If shore power charging does not replenish the batteries, replacement may be necessary.
⚠️ Safety Note: The reset button provides reserve power intended only to stow the ramp and stairs. Repeatedly pressing reset bypasses safety features and may leave you stranded.
On the switch panel, is the amber light on?
The amber LED indicates the lighting timeout has triggered.
Solution: Lighting Timeout Triggered
The lighting timeout automatically turns off interior and exterior lights to save power.
Lights are set to turn off automatically after approximately 45 minutes.
If work was recently performed inside the power cabinet, the timer may have been inadvertently adjusted.
If lights are turning off sooner than 45 minutes and the amber timeout light is on, the timer duration can be adjusted.
⚠️ Note: Missing solar panels likely means open holes in the roof allowing water intrusion. Patch or replace as soon as possible to prevent further damage.
Yes — You Can Charge via Generator or Extension Cord
If the trailer is parked under cover, or if solar panels are damaged, you can plug in to keep batteries charged.
A power inlet port is present on all trailers.
On semi trailers, it is most commonly located behind the license plate on the rear bumper.
It may also be behind the last belly box or near the landing gear.
On TIAD trailers or trailers built prior to 2019, the inlet may be on the power cabinet.
On small trailers, the inlet may be on the power cabinet, near the rear door, or on the nose.
What type of ramp do you have?
Hydraulic Ramp
What issue are you experiencing?
Hydraulic Ramp: No Movement — Circuit Breaker
If your hydraulic ramp shows no signs of life, the circuit breaker inside the power cabinet may have tripped.
Open the power cabinet.
Check that the 150A or 200A circuit breaker is closed.
Test ramp functionality.
If the ramp still doesn't move, check the batteries.
⚠️ Note: Please reach out to The Clubhouse if you need additional troubleshooting assistance.
Hydraulic Ramp: Hydraulic Lock
Hydraulic lock occurs when pressure on one side of a solenoid exceeds the valve's ability to overcome it.
Most commonly occurs during long-term storage with temperature swings.
Can also occur in low-power conditions where solenoids don't receive sufficient power to activate.
The Clubhouse can provide and install a pressure relief valve to help prevent hydraulic lock.
Hydraulic Ramp: Checking and Adding Hydraulic Fluid
Loud noises during retraction often indicate low hydraulic fluid.
Open the hydraulic power unit cabinet and inspect the reservoir.
With the ramp deployed, the reservoir will read lower since the cylinder is filled with fluid.
Fill as necessary — do not overfill.
⚠️ Note: The reservoir should only be filled to the proper level with the ramp fully retracted and the Flying Carpet in the raised transport position.
Hydraulic Ramp: Intermittent Pendant Control
Sporadic operation is often caused by a loose wire inside the pendant plug.
Remove the 4-way plug from the socket and remove the retention screw to disassemble the connector.
Check and tighten all 4 wires inside the connector.
For a replacement pendant or hardwiring options, contact The Clubhouse.
⚠️ Note: The most common cause of pendant issues is pulling the cable itself instead of gripping the connector when disconnecting.
Powered Ramp TEv1 — Data Panel
What problem are you experiencing?
TEv1: Ramp Not Moving
Do interior lights turn on? If not, follow the battery troubleshooting steps first.
Are the actuator rods bent? Are cables pinched or missing? If yes, contact The Clubhouse immediately for manual retraction instructions.
Check the ramp control cabinet (the thinner cabinet with a translucent front) for blown fuses on the two "Rig Runner" fuse blocks — look for the 20A fuses.
⚠️ Note: If fuses continue to blow after replacement, you likely have low battery voltage or a wiring short from physical damage. Contact The Clubhouse to schedule service.
TEv1: Moving in Only One Direction
If your ramp only moves in one direction, you likely need to complete a full cycle in that direction to reset the logic.
For proper timing and sequencing of the main and fold actuators, always go all the way out and all the way in during each movement.
⚠️ Note: At the end of travel, you should hear a beep from the panel. No beep may mean the ramp isn't fully extended, which can cause timing issues during retraction.
TEv1: Ramp Appears Twisted
A twisted ramp may hang up on the doorway when entering or exiting the trailer.
If possible, cycle the ramp all the way to the fully deployed position to re-align the actuators — they align at both fully retracted and fully extended positions.
Then cycle the ramp all the way back in.
During movement, note which actuator pair (main or fold) and which side (driver or passenger) is lagging. You can measure rod lengths with a tape measure to compare.
In rare cases, manual actuator alignment may be needed — see instructions below.
⚠️ Note: Repeated twisting issues may indicate a damaged or bent actuator. Contact The Clubhouse to start the replacement process.
TEv1: Safe Operating Tutorial
Use the switch panel for one-button deployment and retraction of the ramp.
Contact The Clubhouse if you are unsure about any step.
⚠️ Note: Follow the video and information graphic attached to the inside rear door by the switch panel. Operating the ramp without reviewing the material can result in unsafe operation and damage to the ramp, trailer, and personnel.
Powered Ramp TEv2 — Switch Panel
What problem are you experiencing?
TEv2: Safe Operating Tutorial
Use the switch panel for one-button deployment and retraction of the ramp.
Contact The Clubhouse if you are unsure about any step.
⚠️ Note: Follow the video and information graphic attached to the inside rear door. Operating without reviewing can result in unsafe operation and damage.
Powered Ramp TEv3 — Handheld Pendant
What problem are you experiencing?
TEv3: Safe Operating Tutorial
Use the pendant for full control over the main and fold sections of the ramp.
Contact The Clubhouse if you are unsure about any step.
⚠️ Note: Follow the video and information graphic attached to the inside rear door. Operating without reviewing can result in unsafe operation and damage.
Landing Legs Not Touching Ground
Ensure the ramp is fully extended before adjusting legs.
Unscrew the landing legs to extend them, then retighten the jam nut.
If the trailer tail is very high, place blocks under the legs, raise the landing gear to level the trailer, or reposition to more level ground.
Ramp Slow or Sluggish — Battery Review
Slower-than-normal ramp operation or lights turning off during operation often indicates low batteries.
For heavy use or indoor parking, plug in via the shore power inlet behind the license plate or last belly box.
If the trailer isn't charging on sunny days, check condition and existence of solar panels on the roof.
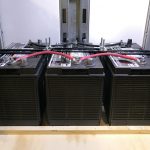
Replacement battery model: AGM31DT
⚠️ Note: Operating the ramp and electronics while batteries are low can damage components, blow fuses, and cause actuator communication issues.
Aluminum Roll-A-Ramps
What would you like to review?
Roll-A-Ramp: Safe Operating Tutorial
Watch the video below to learn safe Roll-A-Ramp operation.
Contact The Clubhouse if you have any questions.
⚠️ Note: Ensure mid-support legs are in place before using the ramp.
Roll-A-Ramp: Operating Manual
During loading and unloading, mid-support stands must be in place to provide rigidity and safety.
Store Roll-A-Ramps properly after each use.
Periodically inspect for loose or missing fasteners and tighten or replace as needed.
Ramp Door — Small / Bumper Pull / Gooseneck Trailers
Contact us or a local dealer if any of the following apply:
Garage door springs broke or cable is mis-wrapped
You need a new approach plate or gap flap
You need locks for your small trailer
⚠️ Note: Many local trailer repair facilities can service rear doors — trailers don't need to come all the way to The Clubhouse. Reach out if you need help finding a facility near you.
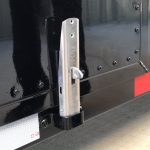
What staircase issue are you experiencing?
Stair Feet Broken or Missing Hardware
Stair feet are 3D printed and designed to protect other stair components from damage.
Replacement feet for normal wear and tear are available in the online store.
If the feet shattered, the stairs may have been in a bind from incorrect deployment. The slotted shoulder bolt at the top of the mount accounts for air-bag sag from the tractor — over-deploying until the actuator binds can put the stairs under extreme load.
For missing hardware, reach out to The Clubhouse to identify the correct replacement parts.
⚠️ Safety: Missing hardware can result in damage to the trailer or injury to users. Inspect hardware routinely.
Stairs Won't Deploy or Retract
Check for power at the trailer — do interior lights turn on?
If applicable, ensure garage door cables are properly wrapped around the drum.
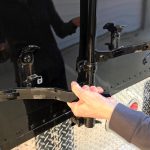
Check for blown fuses in the battery compartment.
If needed, powered stairs can be manually raised and strapped into the trailer: remove the actuator shoulder bolt with the supplied T-Handle wrench and pivot the stairs up into the trailer.